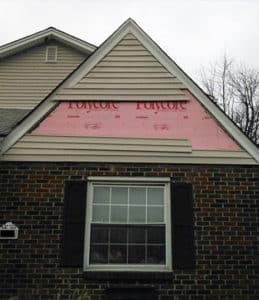
How to Replace a Piece of Vinyl Siding: Cincinnati Vinyl Siding Repair

Vinyl Siding Repair
People love what vinyl siding can do for a home. Not only can it be a beautiful look for a home’s exterior, it is a maintenance-free product… almost. It’s true that vinyl siding may not need to be painted every 3-5 years like wood or aluminum siding. It does, however, sometimes need cleaning to remove dirt or algae. And while vinyl siding is extremely durable, it can be cracked or punctured from time to time. Additionally, excessive heat from reflected sunlight or a backyard grill can melt or warp vinyl siding. So what do you do when you need Cincinnati vinyl siding repair? While you can always contact ProMaster for any of your home repair needs, minor repairs are something you can easily take care of yourself. Here’s how to replace a piece of vinyl siding.
How to Replace a Piece of Vinyl Siding:
Step 1:
Obtain a matching piece of siding. Many home stores can point you in the right direction, but it’s not always easy to find a match. If finding the perfect color is affecting your ability to replace a piece of vinyl siding, you may need to get creative.
(If your siding repair is easily noticeable on the front of your house, here’s a quick fix. Use the following steps to remove a piece of siding from the back or side of your house to match the damaged area on the front. Then, obtain a replacement piece as similar as possible to your original color. Take the replacement piece to your local home store paint department and have them match the color. Use an acrylic house paint on the replacement piece, and replace the now empty section on the side or back of your home.)
Step 2:
Insert a zip tool under the bottom edge of the siding immediately above the damaged piece. Slide the zip tool along the siding for the entire length of the damaged piece. This will unlock the damaged piece from the section above it.
Step 3:
Hold the top piece away from the damaged piece. Use the claw of your hammer or a prybar to remove the nails from the top of damaged siding.
Step 4:
Remove the damaged piece of siding from the side of the home. You should be able to do this easily by sliding the piece downward, but your zip tool may help detach the removed piece from the piece below it.
Step 5:
Cut the replacement piece to the same length as the damaged piece using a circular saw or tin snips.
Step 6:
Hold the new piece of siding in place, and nail it to the side of the home. Use 1 1/4″ roofing nails. Be sure not to drive the nails tight against the siding, leaving room for the siding to expand and contract. This will prevent warping.
Step 7:
Using your zip tool, pull down on the bottom edge of the piece above the replaced section. While pulling down, push in on the siding, locking it into the new section. Slide your tool along the edge, until the old siding has been locked together with the new.
Now you know how to replace a piece of vinyl siding!
Cincinnati Vinyl Siding Repair
Is your repair larger than just a single piece? Don’t have the time or confidence to do the work yourself? No problem. ProMaster Home Repair has taken care of Cincinnati vinyl siding repair jobs for years. We’ll be happy to help you! Feel free to contact us, schedule online, or use the form at the bottom of the page. We look forward to helping you!


Speak Your Mind